
The Last Sourdough Bread Recipe You Ever Need
This is the best and most complete sourdough bread recipe you ever need, consistently rewarding you with world class beautiful and tasty sourdough bread every time.
Update 13th March 2025: I originally wrote this recipe in 2020, and since then, there have been many important updates. I have compiled all my latest findings into a free, donation-based book. You can read the full book for free here: The Sourdough Framework – Wheat Sourdough. If you find the content valuable, a donation is greatly appreciated ⭐. Your support helps me cover the running costs and improve my teachings.
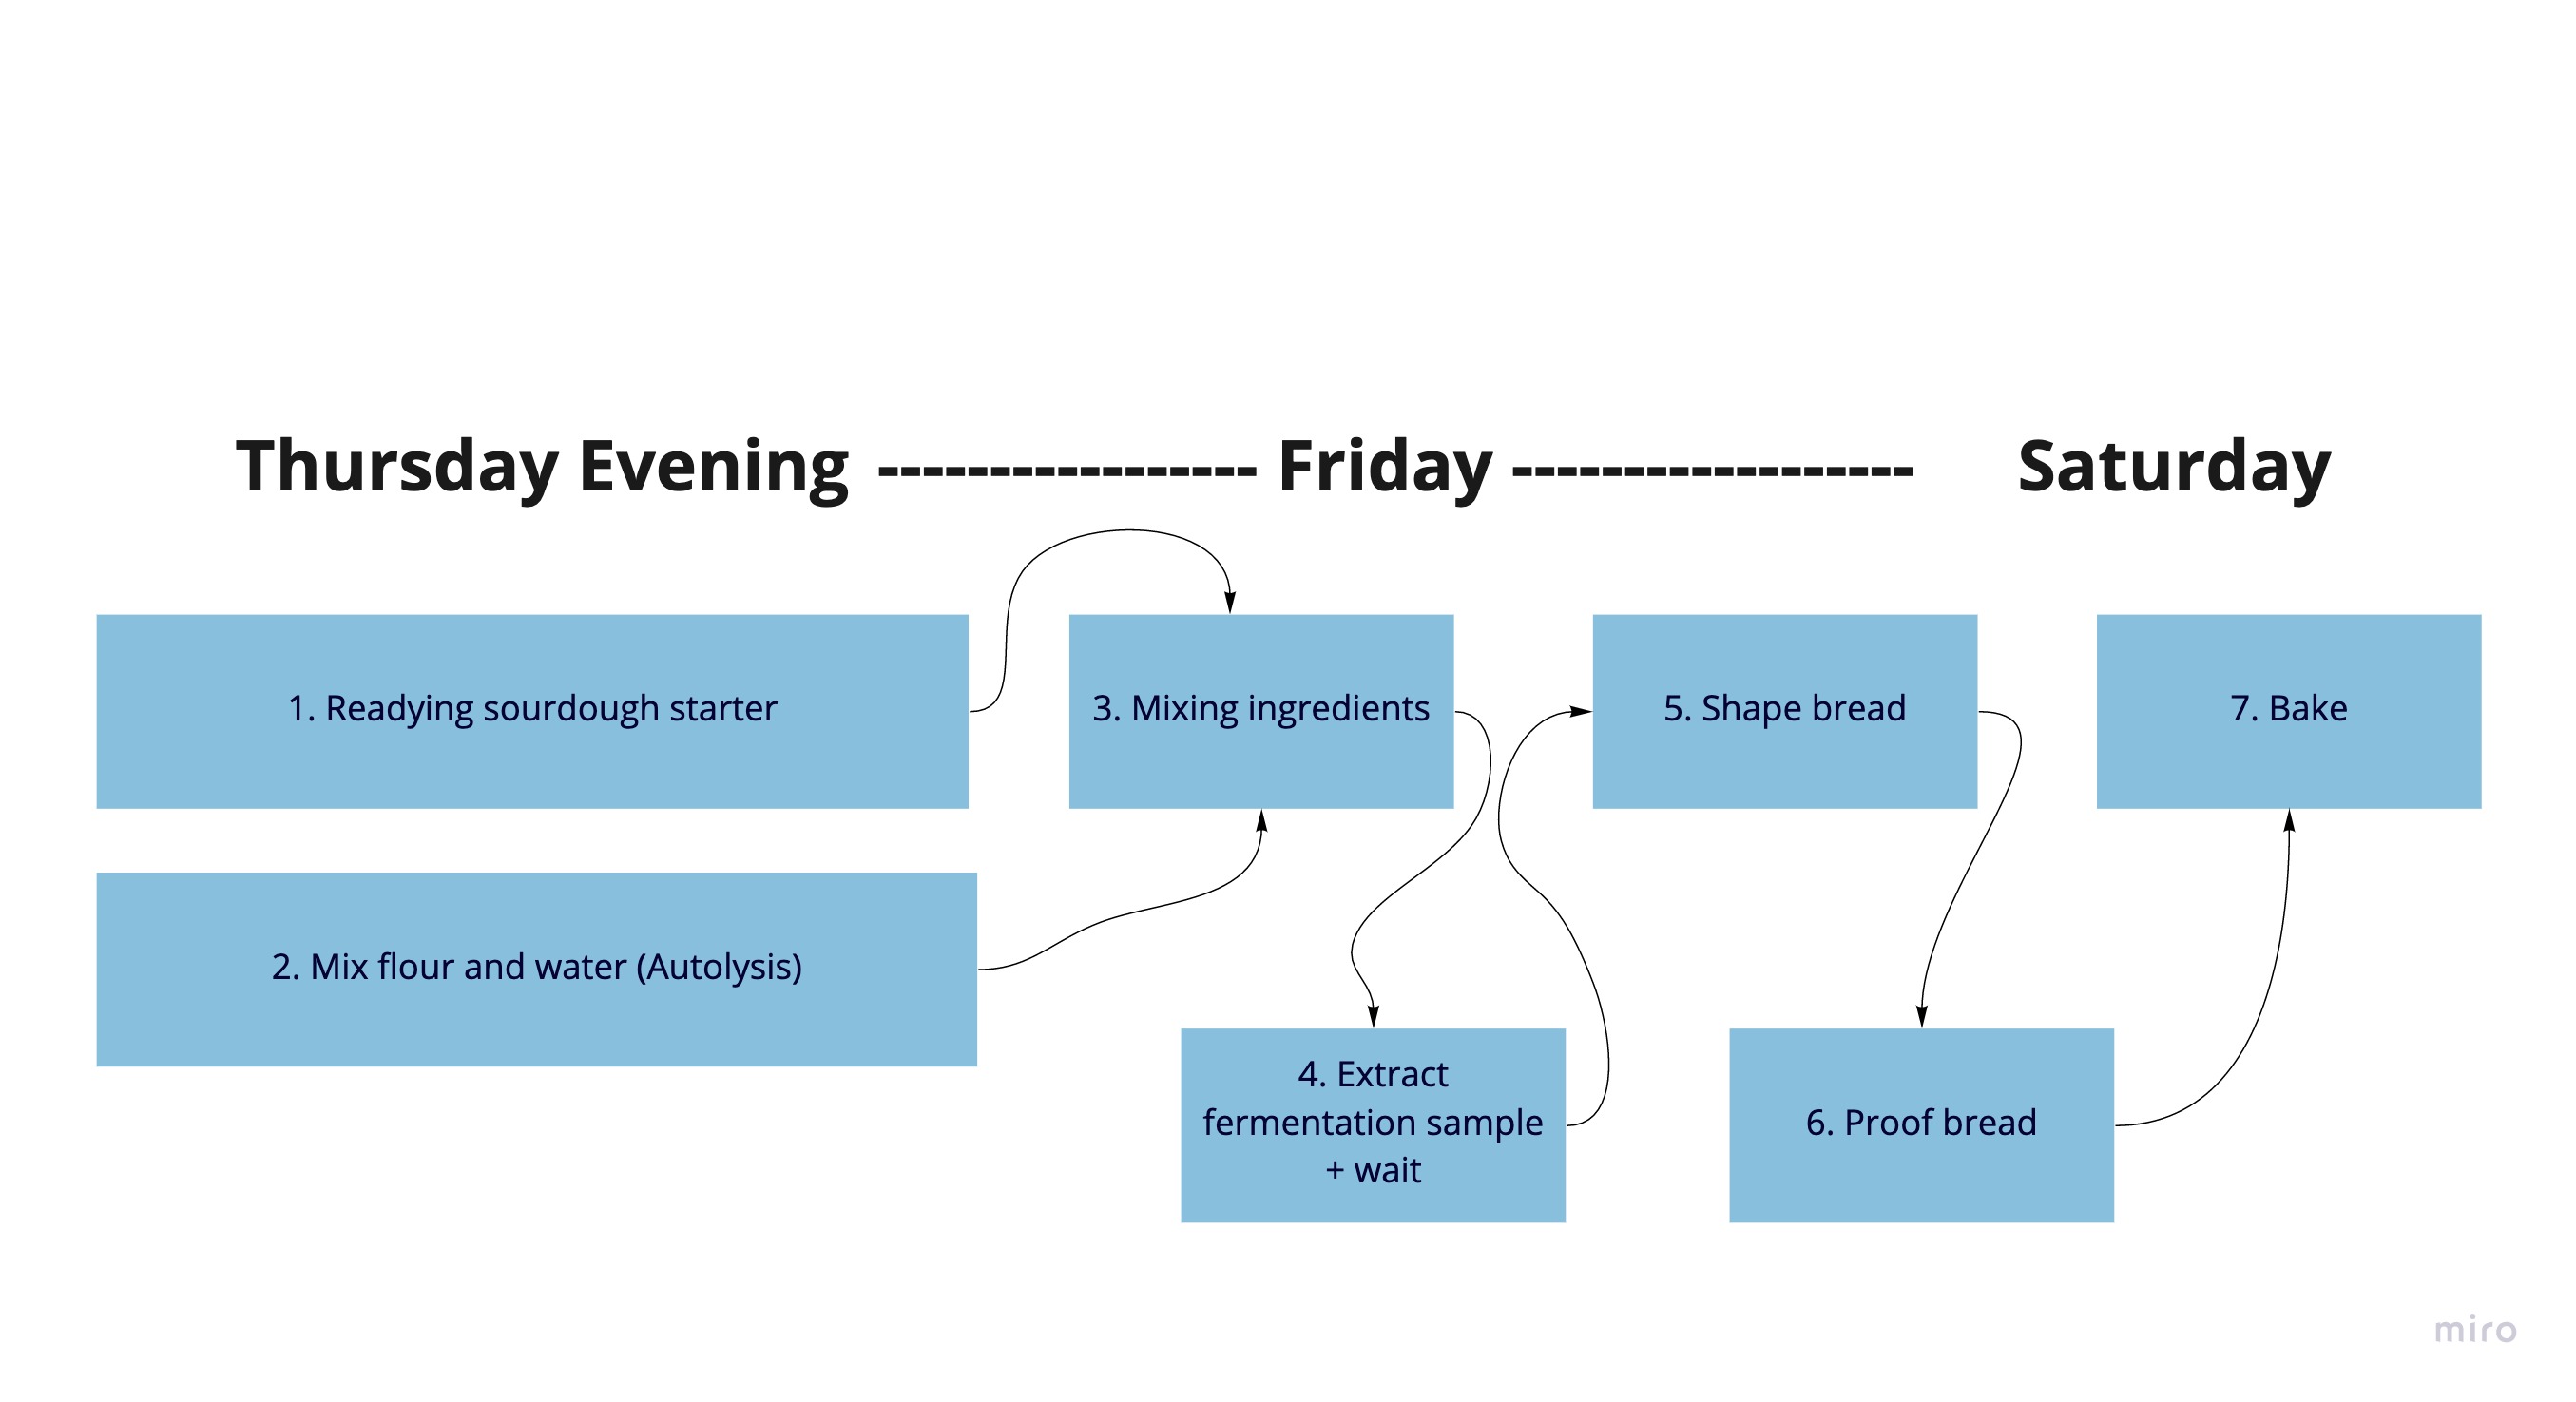
Update, October 2026: I no longer autolyse. Mix everything on Friday morning with 25 to 50 g starter (5 to 10 %) instead of 100 g. The longer bulk fermentation gives the enzymes the same time. The size increase table, the proofing time and the core temperature below now follow my book. The process chart still shows the old autolyse step.
The short version
- Dough: 400 g bread flour, 100 g whole wheat flour, 10 g salt (2 %) and 275 to 350 g water. The more protein your flour has, the more water you can use.
- Starter: feed it 1:5:5 and use 25 to 50 g (5 to 10 %). No autolyse needed.
- Bulk fermentation: watch a sample in a small jar. Stop at 25 % growth for flour with 8 to 10 % protein, up to 100 % for 12 to 15 %.
- Proofing: 30 minutes to 3 hours at room temperature (finger poke test), or 6 to 24 hours in the fridge.
- Baking: 230 °C (446 °F) with the fan off, 30 minutes with steam and 15 to 20 minutes without. Done at about 92 °C (197 °F) in the core.
Everything is done from scratch, explained in detail, easy for you to follow leaving no questions unanswered. This masterclass looks at the recipe as well as the why behind it. That way you know how to adapt when things go sideways. The original class can be found as a video on my YouTube channel. Please note this is only for wheat based breads with more than 80% wheat.
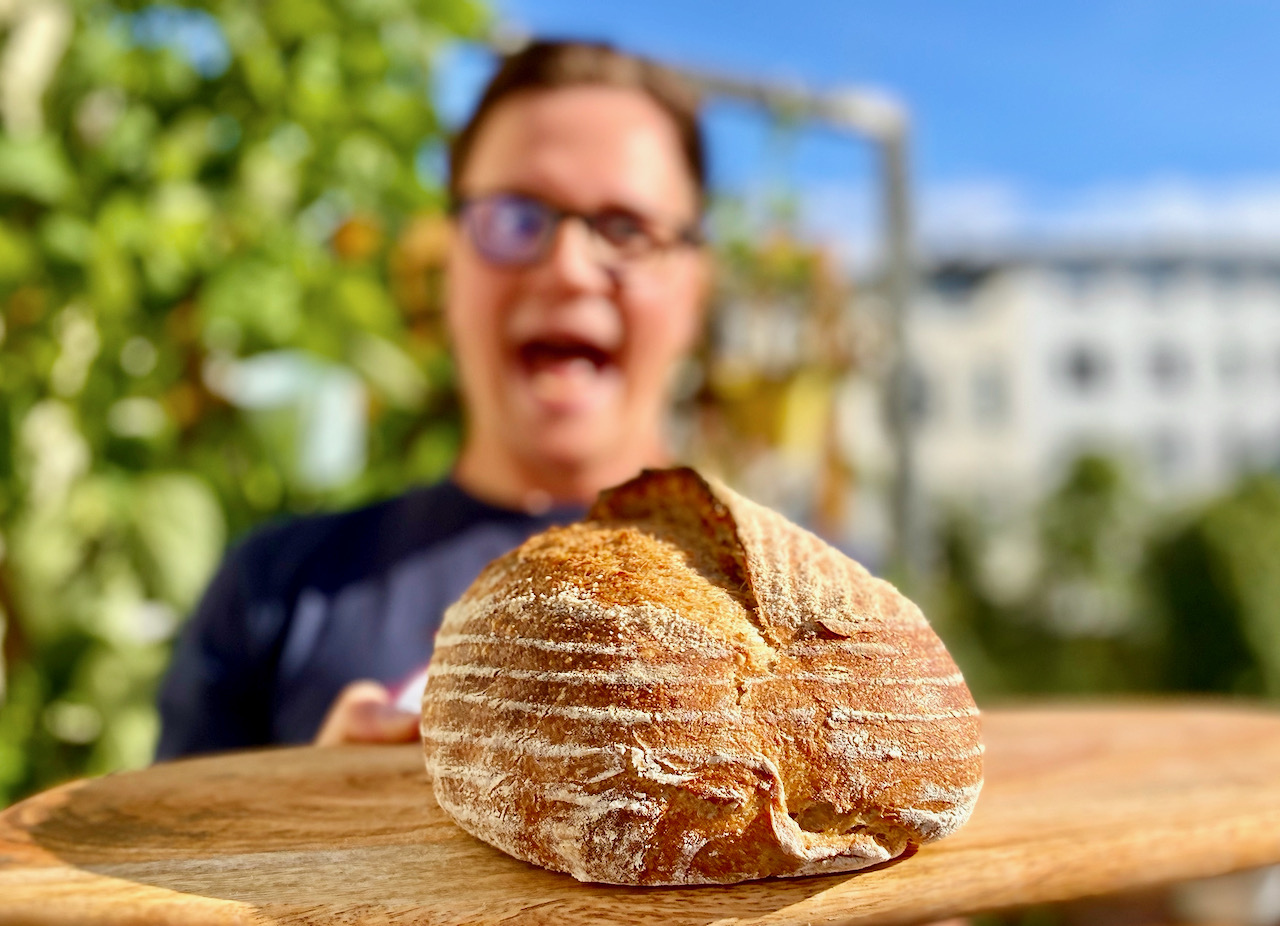
I am assuming that you want to bake the sourdough bread in the morning to have it ready for breakfast. This recipe assumes that you want to have the dough ready on Saturday morning. You might have to adjust the days depending on when you actually want it ready.
Ingredients
- 400g bread flour (> 10% protein), in German take T550
- 100g whole wheat flour
- 275-350g water (see below)
- 25-50g active sourdough starter (5-10%)
- 10g salt (2%)
Note - the more protein your flour has, the more water you can use. This is crucial as you might bake a frisbee in case you overdo it.
| Flour % Protein | % Hydration (bakers math) | Grams water absolute for 500g flour |
|---|---|---|
| < 10 | 55 | 275 |
| 10-12 | 60 | 300 |
| 13-14 | 65 | 325 |
| > 15 | 70 | 350 |
Instructions
The key to making great sourdough bread is to control the fermentation process. This is the one parameter that you need to understand and master, the rest is just 20%. That’s why you want to make sure to have a healthy and active sourdough starter.
Readying the sourdough starter
Your sourdough starter should rise and show bubbles within 5-10 hours after a feeding at room temperature. It does not have to double: with rye or weaker wheat flour it rises less and can still be healthy. Use it just before it collapses, rather a little too early than too late. If it barely moves, feed your starter with the below shown process. Furthermore you want to check out this video on 4 tips that will make your sourdough starter more active.
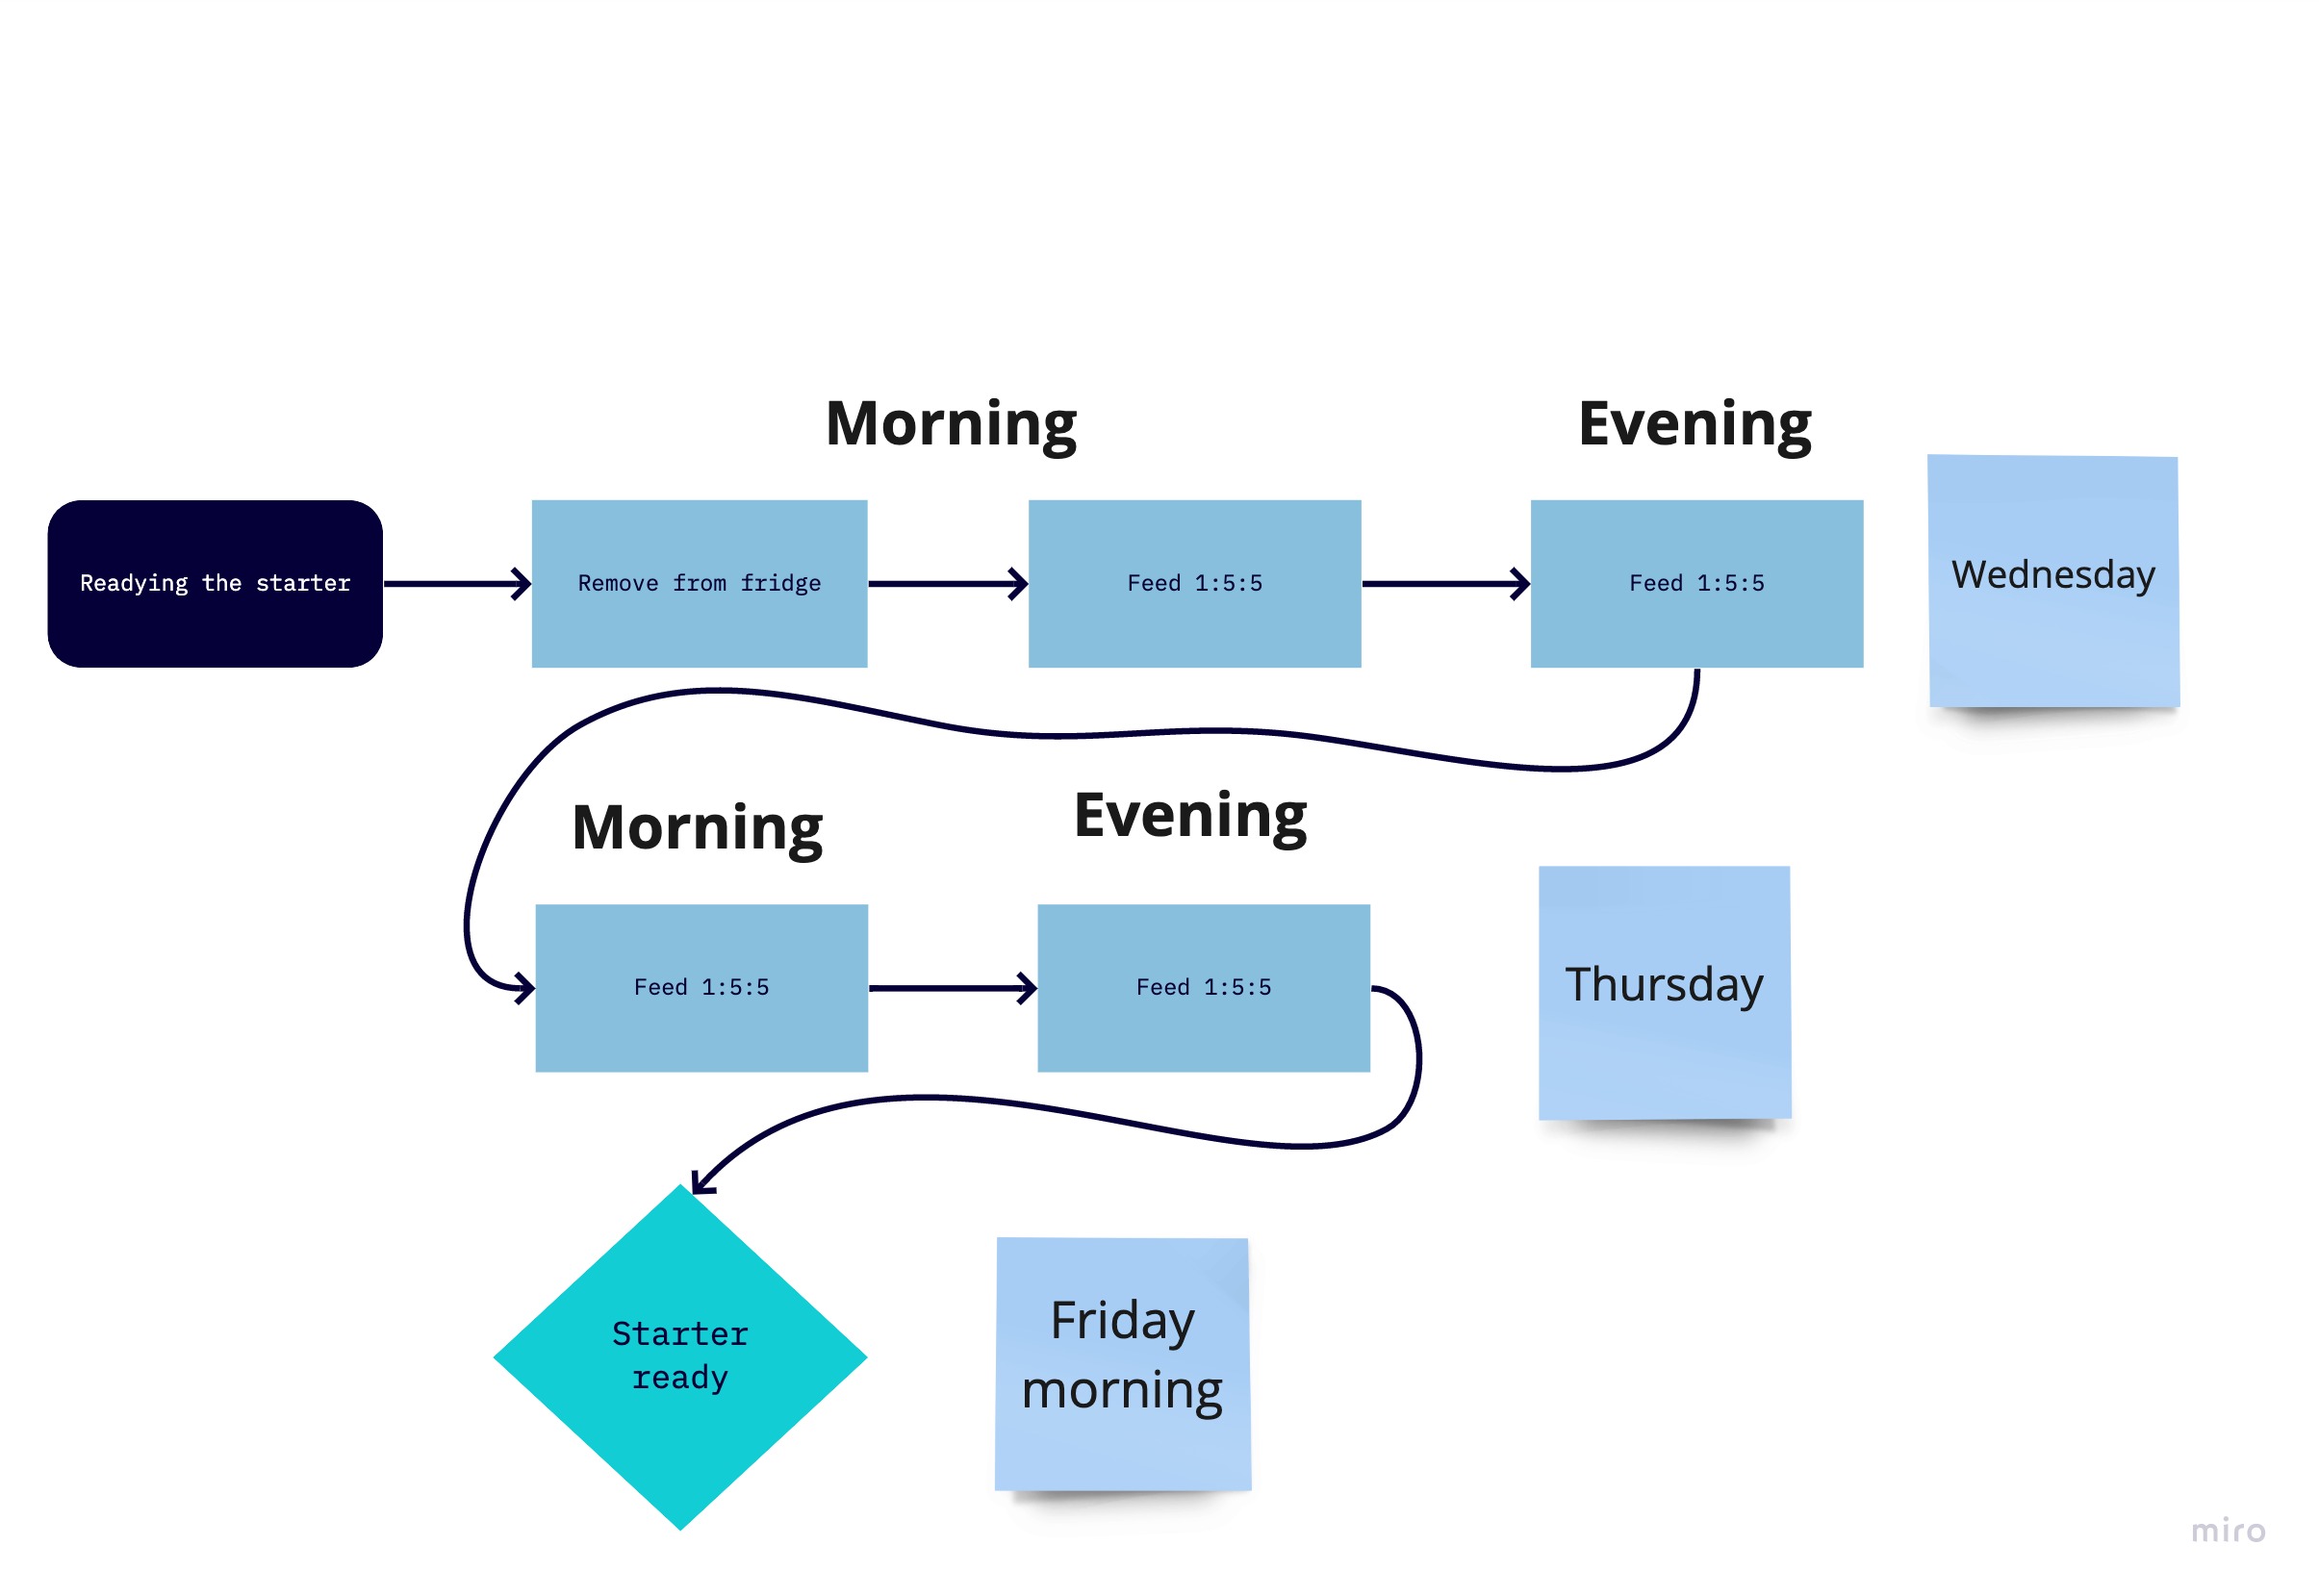
Note the 1:5:5 in the image means, 10 grams of sourdough starter, 50 grams of flour and 50 grams of water. You want to be feeding ideally whole rye, or whole wheat flour. This will make a more active sourdough starter.
Autolyse (optional)
I no longer do this step, see the update at the top. If you still want to:
- Mix flour and water, fully hydrating flour
- Let it rest at room temperature over night
- Make sure that there are no crumbly parts of flour left.
Bulk fermentation
In the morning on Friday you want to mix everything together. This starts the bulk fermentation stage. Bulk since you could actually be doubling all the ingredients and then you could make 2..N breads at the same time.
- Add the active starter to the main dough
- Add the salt to the main dough
- Mix until everything is nicely homogenized (very important)
- For me this takes around 1 minute
- It might take you up to 5 minutes
- You want to make sure the sourdough starter has been evenly spread across the dough.
Let the dough sit for another 15 minutes covered. I like to use a large metal pot. This makes sure the gluten network forms again after we damaged it while adding the starter.
- Now remove the dough and place it on your bench (no flour!)
- Extract a small sample from the dough and place it in a cylindric shaped container.
- A shot glass works, or anything else that has a cylindric shape. This sample will tell us exactly when the dough is done bulk fermenting. Mark the dough with a rubber band or a marker. This way we can see the size increase.
Next up we want to create dough strength.. There are multiple ways we can do that, however for this recipe we will be doing a set of bench kneading only. The higher you go in hydration, the more dough strength you have to build. You could of course also be using a mixer to do the same thing.
- Proceed with kneading the dough on the bench. It’s important that you have no flour on the surface.
- Pull the dough as far out as you can, without tearing it
- Fold over the dough to glue itself together
- Repeat once from each side
- Drag the dough over the surface using your hands at a 45° angle
- This only works because the dough is stuck on the surface
- Your dough ball should become nice and round
- Wait a minute, repeat the same process 3 times
Great. You have now built a dough with a lot of strength. Return the dough to your container, it should be a nice and smooth round ball. If it is not, wait another 15 minutes, return it to the surface, practice rounding the dough ball one more time.
Make sure that your dough sample has been properly marked in the container. It’s crucial that you homogenized the dough properly initially, else the dough sample might be slower or faster than the main dough. Ideally both should be close together and the dough should be the same temperature as your room temperature. This way both doughs ferment at the same speed.
Depending on the amount of protein (out of which 80% is gluten for wheat), we need to aim for a different size increase. The more gluten you have, the more you can inflate the dough. This is crucial to know. Furthermore, the more gluten you have, the longer you can ferment your dough. Over time the gluten is damaged by the acid produced by sourdough resulting in a weaker gluten network. You’ll notice that for instance if your dough was nice and round and then suddenly it’s very sticky.
| Flour % Protein | % Size increase |
|---|---|
| 8-10 | 25 |
| 10-12 | 50 |
| 12-15 | 100 |
| > 15 | > 100 |
While your dough is bulk fermenting, you can be doing a stretch and fold every few hours. Typically when you see your dough has flattened out quite a lot. However, the more you touch your dough, the more even your crumb is going to be in the end.
Coil folding is a great way to stretch and fold and very gentle on the dough:
- Slightly wet hands with cold water
- Release dough from sides of container
- Use a very light touch; the less you touch the dough the better
- Do 2 opposite sides, then 3rd side pull dough under and then 4th side roll it over. See the full video
- Return to container and cover
This can take anywhere between 4 and 12 hours. Check out this table that shows fermentation times depending on your temperature. Please also take this with a grain of salt, as this might differ depending on your starter and other issues. The sample is the single best way to check your fermentation progress.
Shaping the dough
Your dough should look bubbly. Proceed and shape when your sample has reached the desired size increase. A tight shaping is essential to then allow your dough to spring in the oven. At the same time you have to be careful to not deflate your dough too much.
- Prepare your banneton (if using)
- Very lightly flour counter/surface
- Flip dough out onto it
- Do letter fold to stick dough together
- Gently push out and roll together, tightly
- Pinch ends closed (for oval loaf)
- Gently flip over and put in banneton (or lined container)
- Pinch bottom seam together, for more tension (for boule)
- Gently rub the top with a bit of flour, not rice flour, so the dough does not stick to the banneton and is easier to score
- See the full video on shaping the dough
Proofing stage
The proofing stage is essential to inflate the tightened gluten network again. It’s sometimes a little hard to make this work with your schedule. This is where your fridge comes in handy as you can decide when you want to bake your bread.
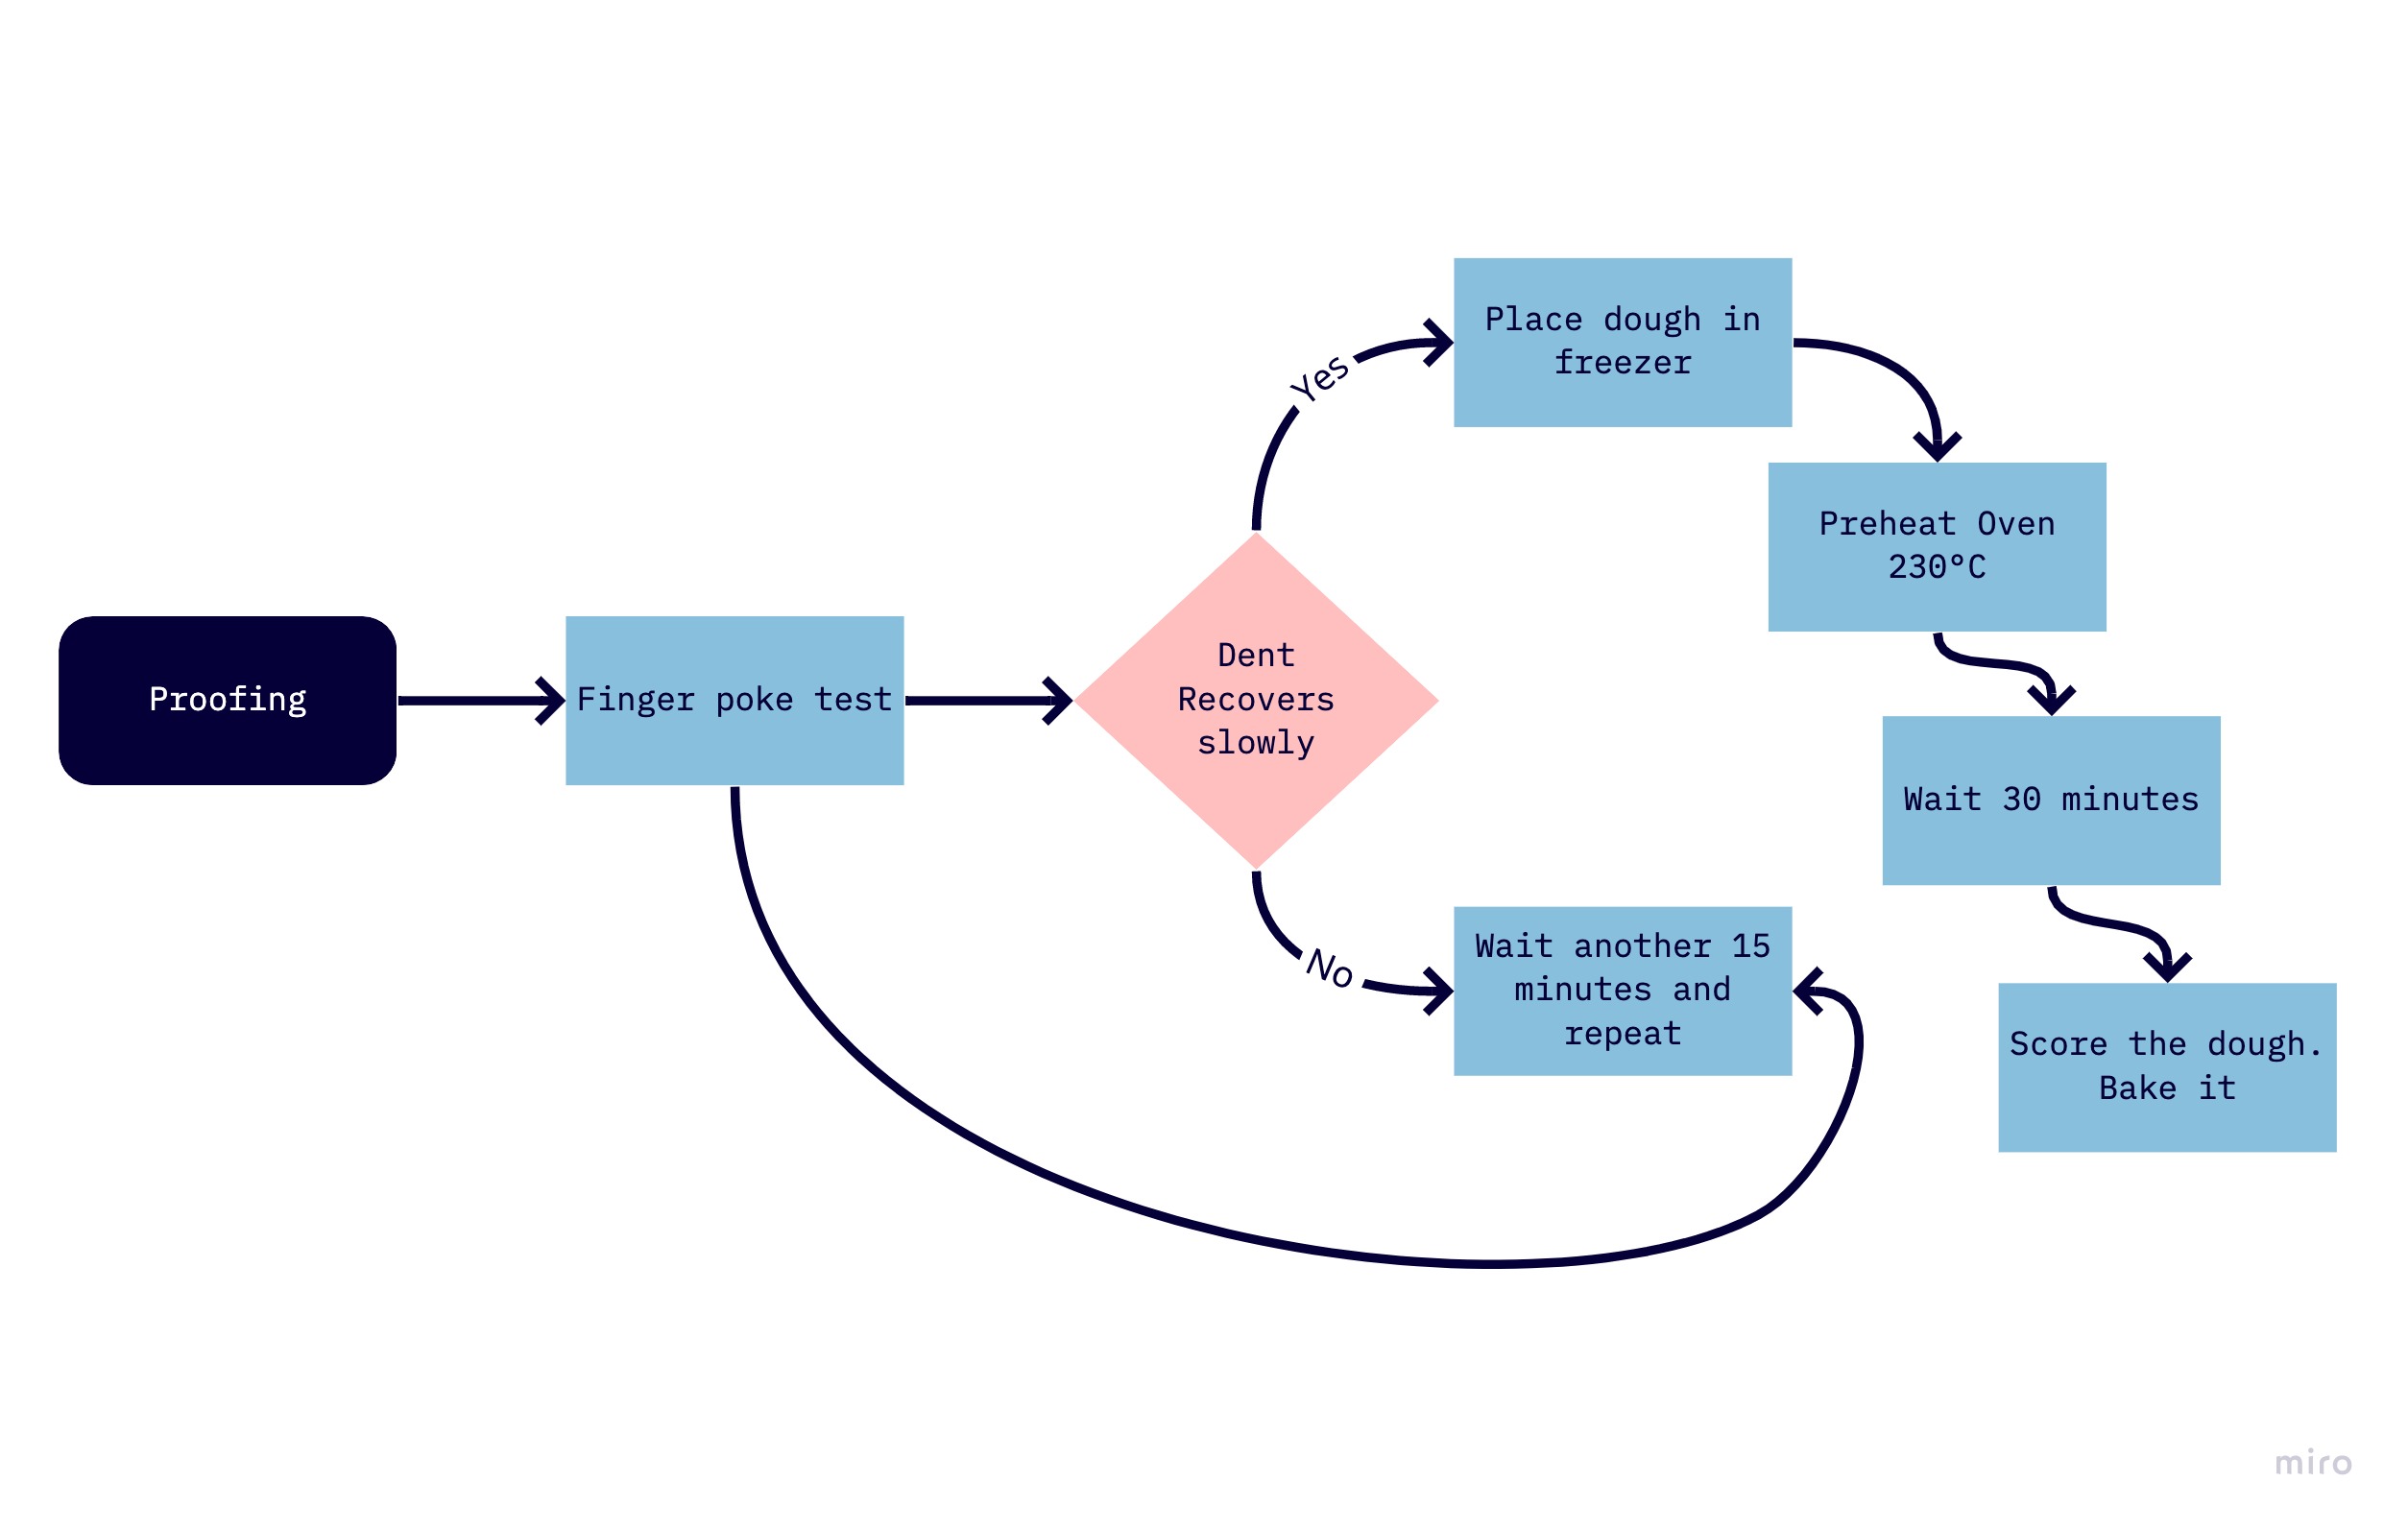
- Will take 30 minutes to 3 hours at room temperature (until the finger poke test is passed)
- Place shortly before the finger poke test passes in the freezer for 30 minutes to make scoring easier
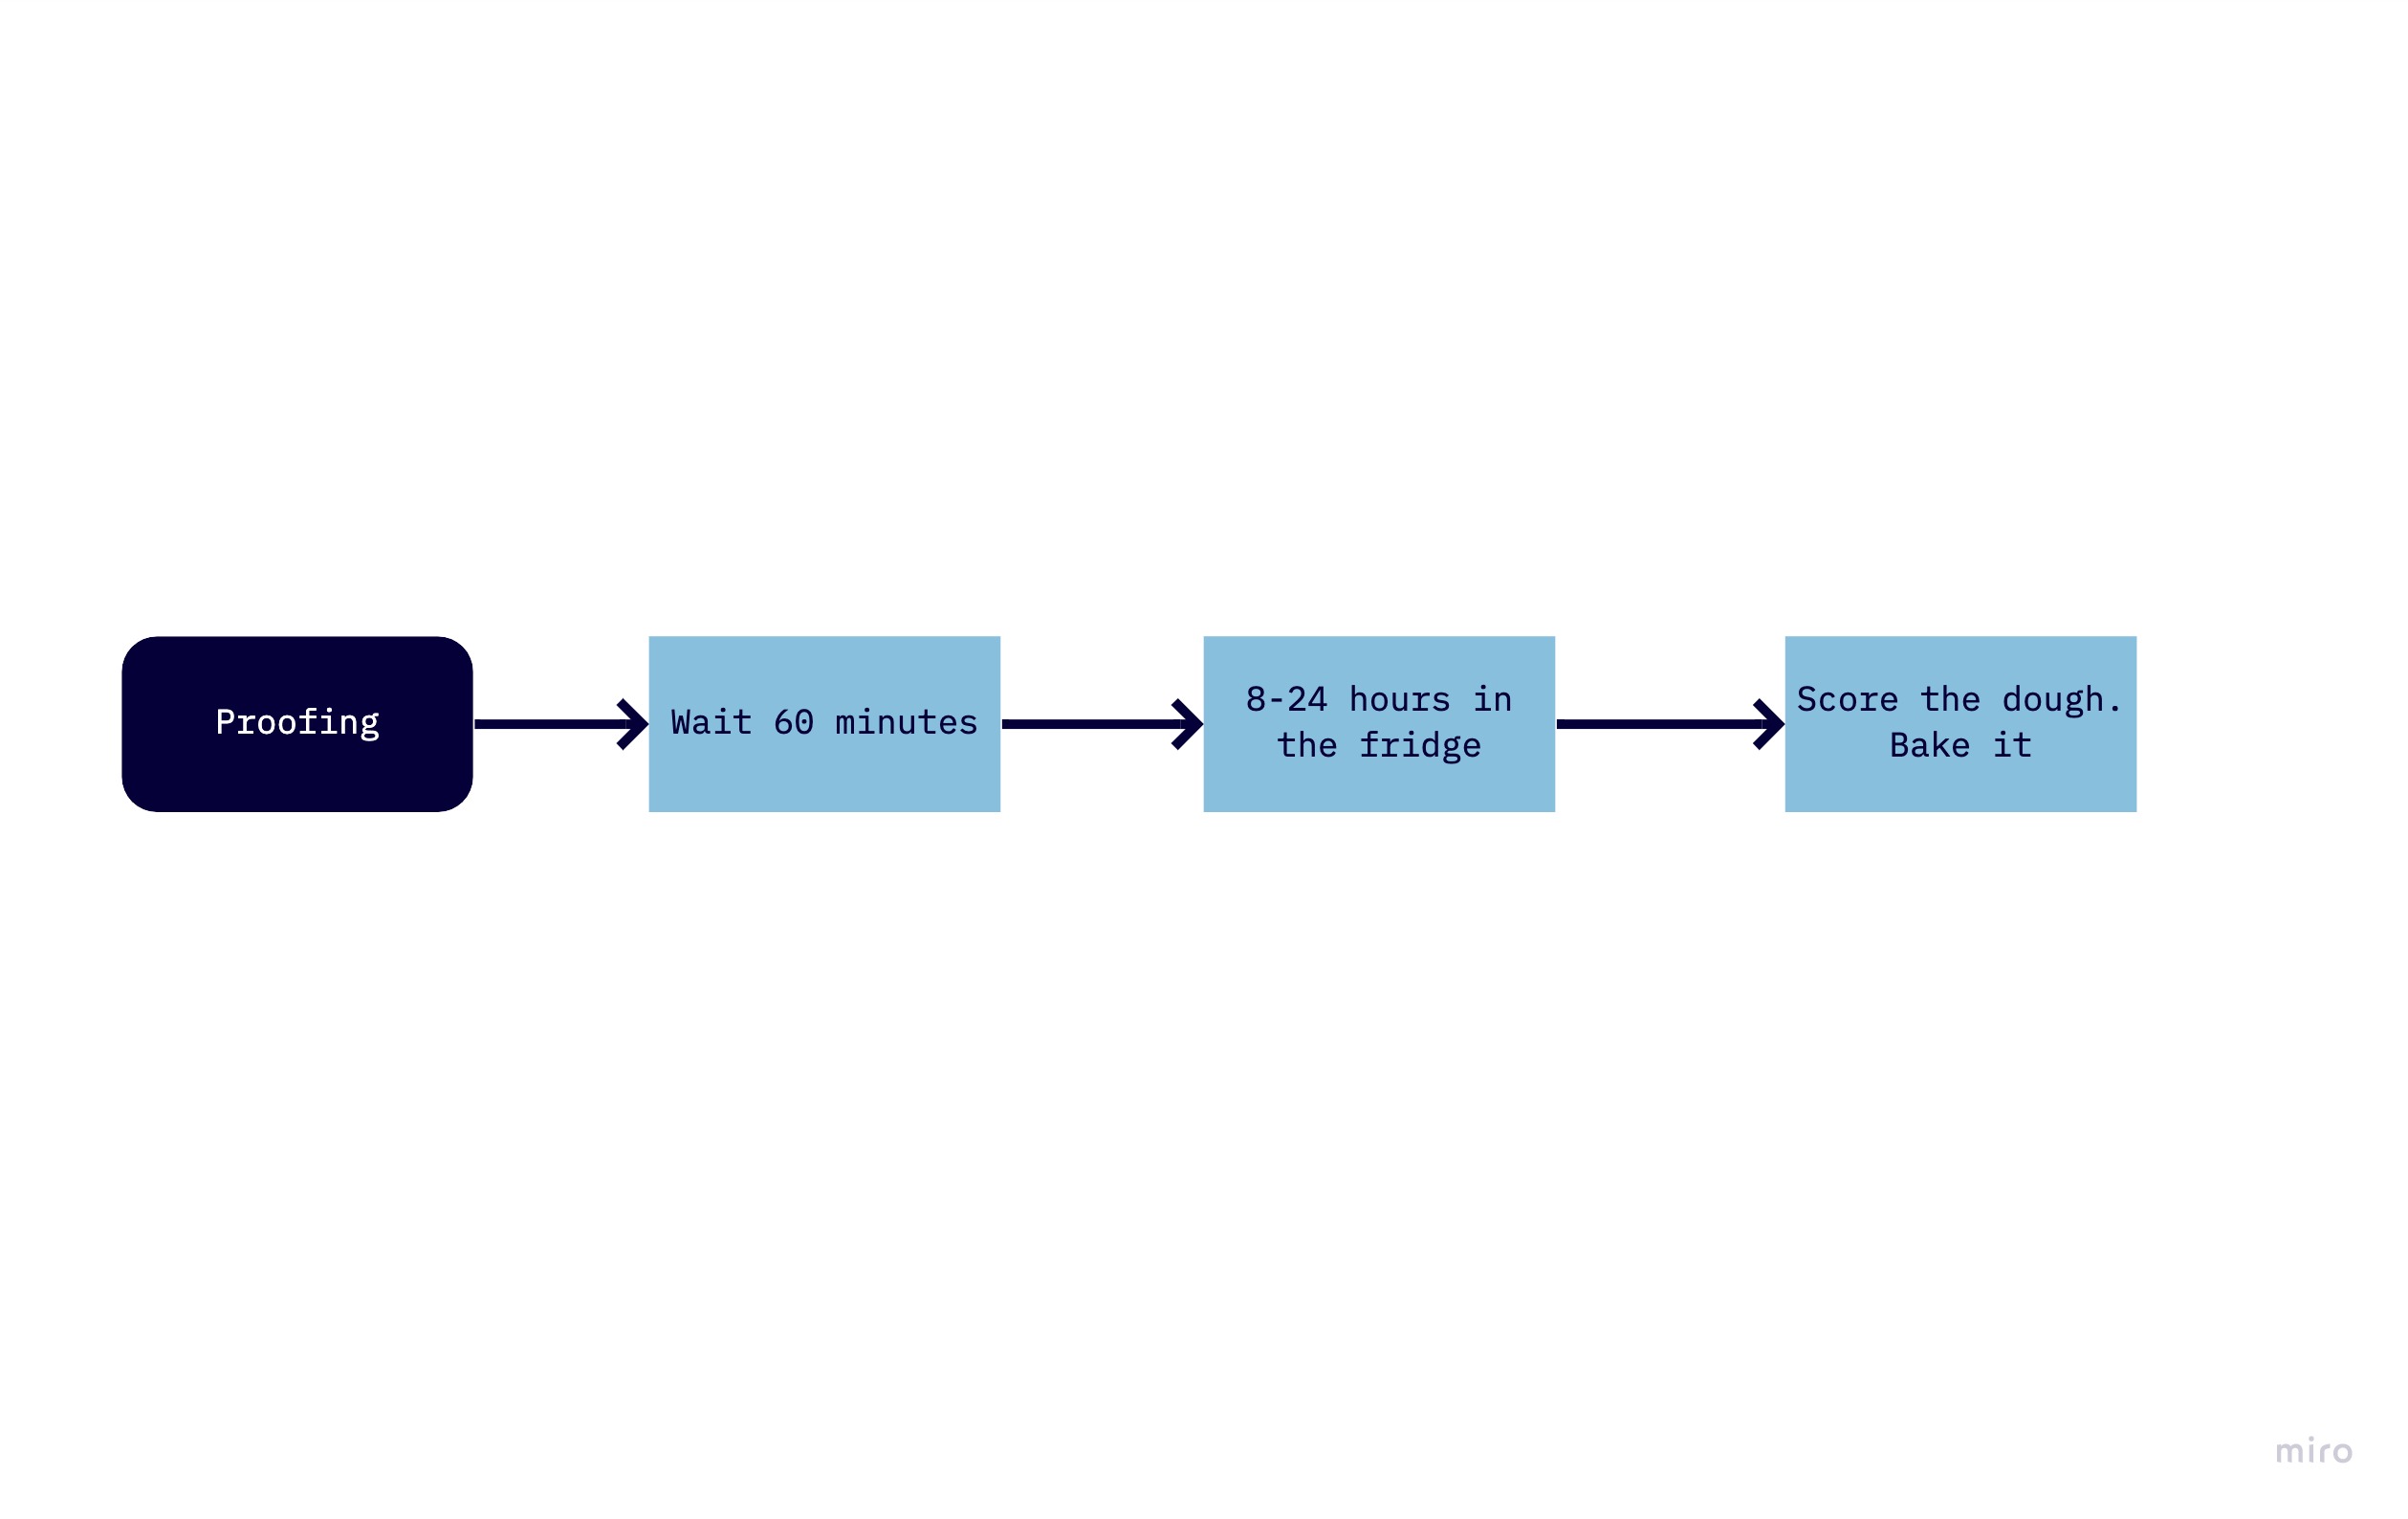
- Or - place for 1 hour at room temperature, then another 6-24 hours in the fridge. This way your bread will be ready directly for breakfast.
I have added 1 more flowchart for the process at room temperature:
And then if you opt for the fridge option, do it like this:
Baking
Baking is then the last stage where everything comes together. You can either bake using a dutch oven, or using a tray and/or a stone. Make sure that the baking medium is preheated, as this makes sure that you have more oven spring.
- Preheat oven for maximum for at least 30 minutes
- If using Dutch oven, heat it in the oven for about 30 min. (lid separated)
- If baking on sheet or stone, heat stone and sheet while heating oven
- Also heat the container (e.g. cast iron skillet) at the bottom of the oven to use to create steam)
- Place inverted baking tray (with sides) on uppermost rack of oven after putting in bread, to catch the steam. At 30 min., remove this tray and the water container
- Gently turn dough out of banneton onto parchment, or directly into hot dutch oven (careful!)
- Score dough to control where you will have oven spring. This takes a few attempts. You can practice this when you initially kneaded and made a smooth ball.
- Place in Dutch oven or on baking stone or sheet
Good job. The dough should flatten out a little bit, but then spring back in the oven.
Change the temperature of your oven to 230°C and make sure the fan is turned off.
- Bake for 30 min.
- Remove lid of Dutch oven or remove top inverted tray and water container (if using)
- This makes sure we no longer have steam. That way you will develop a nice crust.
- Bake for 15-20 min. more until your bread has your personal desired color
- It is done once the core temperature reaches about 92°C (197°F).
- Remove from oven and cool on cooling rack (without parchment) for at least four hours before slicing
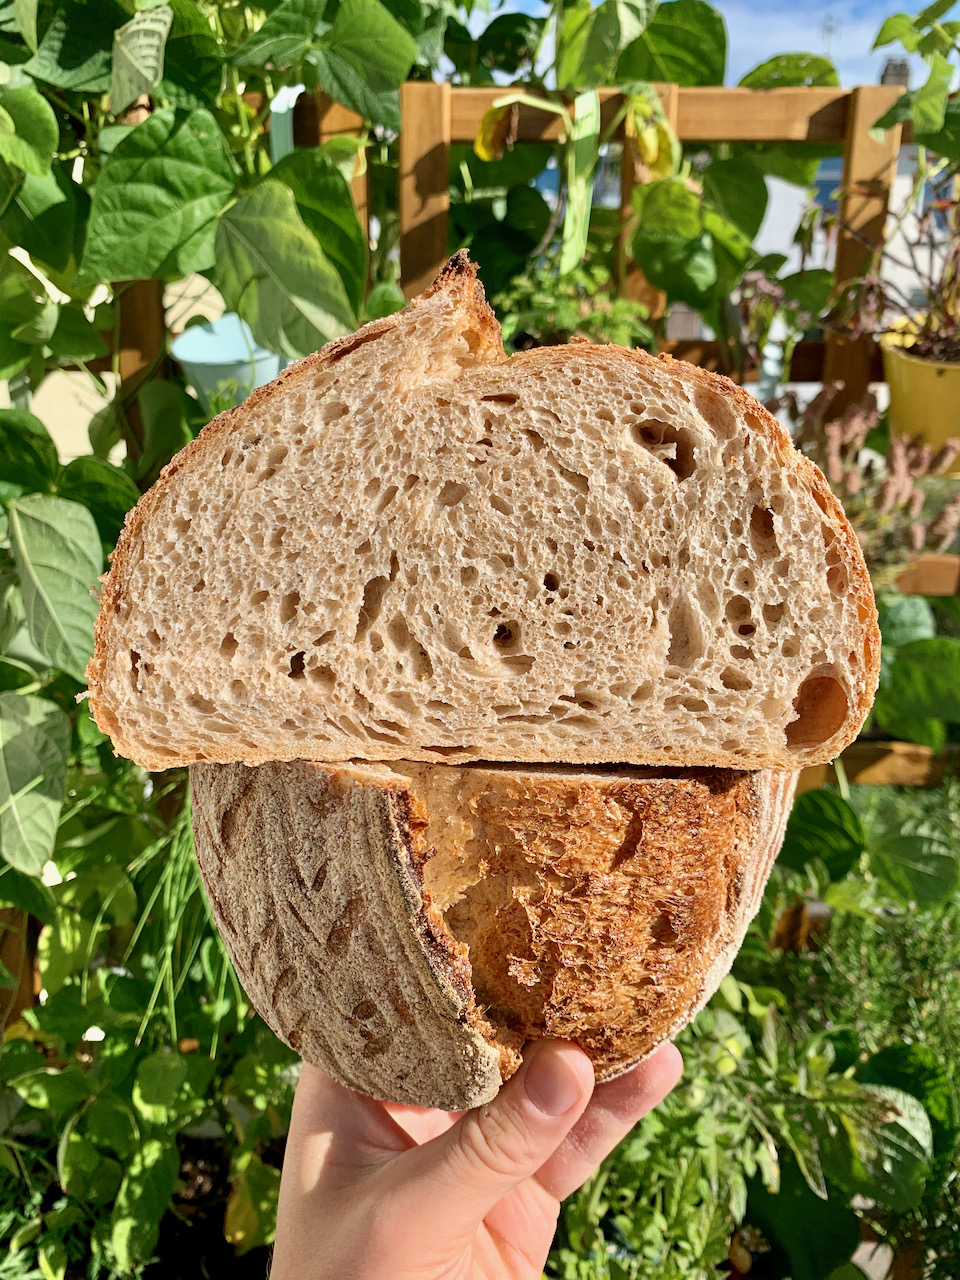
And here is another crumb shot to finish the recipe. Please let me know if your bread looks similar. Thanks to Peg Ross for helping me write this down!
If you have any questions or need assistance with this recipe, I encourage you to join our community chat. Our members are eager to help you enhance your bread-making skills. You can find us at: https://breadco.de/chat